Shadows in landscape
Landscape architect Stephanie Lagunas teaches us in her article “Shadows in the landscape” the use of shadows in drawing.
Perhaps the use of shadows in drawing seems very professional and complex, but I would dare to say that it is justintuition and observat ion in our environment. Implementing shadows in our architectural-landscape drawings not only gives them a more realistic look, shadows also help us to communicate important aspects:
Here, we will talk in a general way how shadows behave and how they are represented according to the angle from which the light comes. We will draw step by step the scene of a park and we will add shadows, we will see the difference between our drawing with shadows and the same scene but without shadows and finally, we will see a couple of examples of color illustrations and with the handling of shadows.
01- Base Stroke:
To draw the shadows and create the textures of the leaves, we can use an irregular flattening. It is drawn by making sets of fast and continuous lines in different directions in random ways. You can press the pencil more or less on some strokes to get dark and light areas.
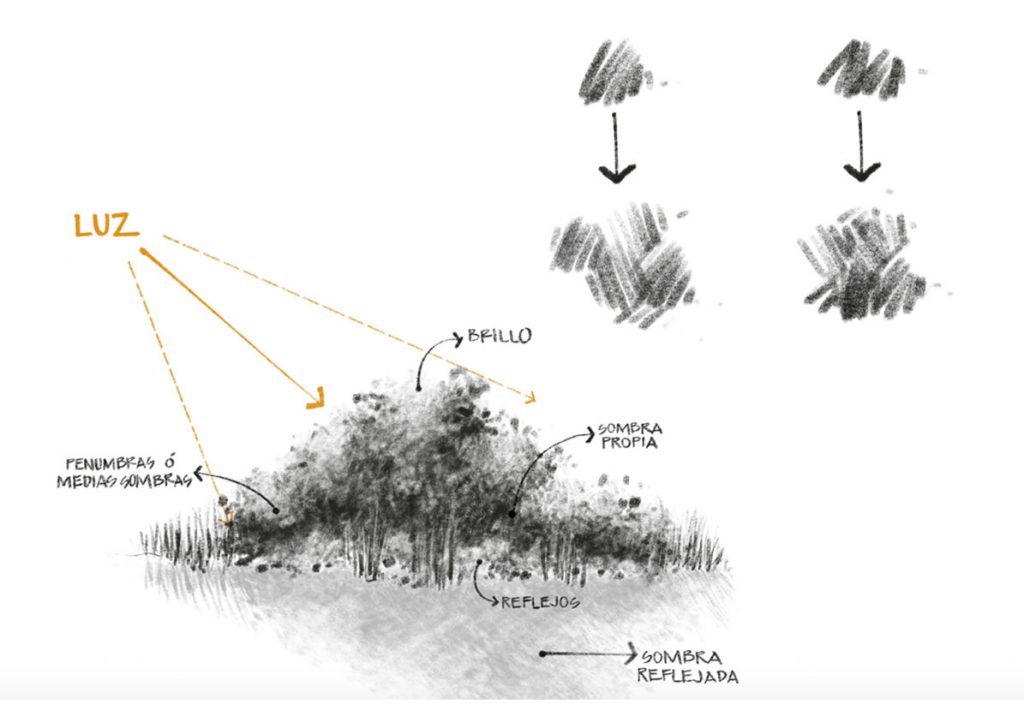
Ilustración: Stephanie Lagunas
02- Sketch:
Start by drawing simple lines as faint and smooth as possible. This is only your guide for drawing and you can change it later on.

Ilustración: Stephanie Lagunas
03- Light:
Decide from which angle the light will reach the scene you will draw. Remember that the light, when bouncing on the objects, will bounce in different directions. Doing this super basic scheme will help you for future reference. Don’t forget that all objects will be illuminated from the same angle.
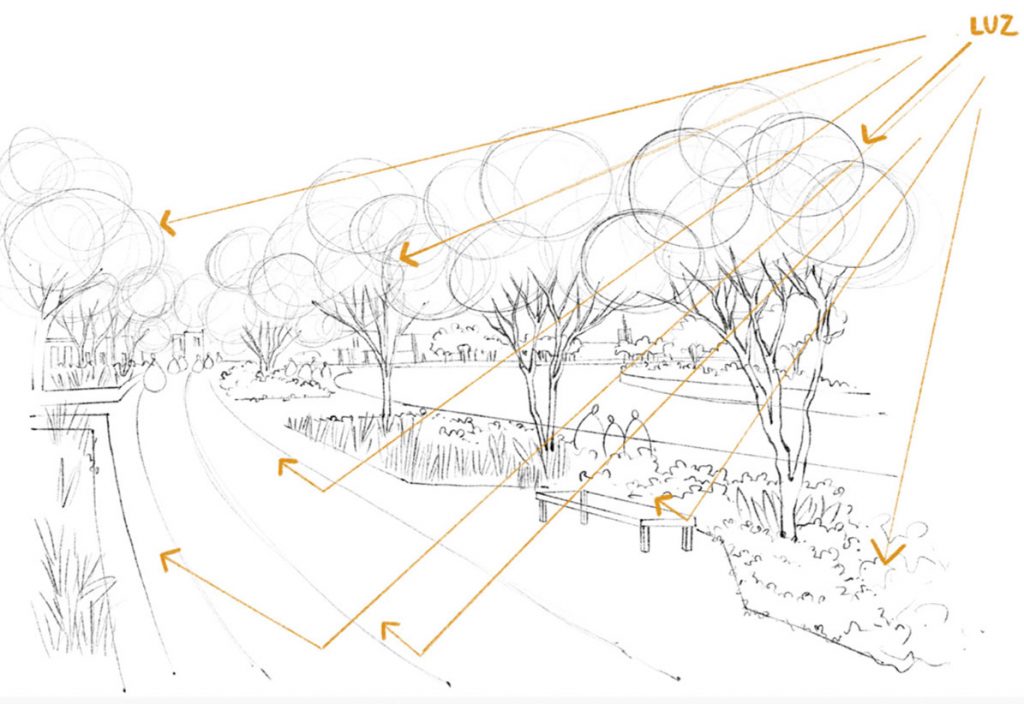
Illustration: Stephanie Lagunas
04- Visual planes:
If you are drawing in perspective, keep in mind the amount of planes you will draw, because the farther away an object is, the smaller and dimmer it will look, also, the farther away, the less details will be drawn.

Illustration: Stephanie Lagunas
05- First shadows:
You can start by drawing midtones, this starting point will help you to lower the saturation as you move to the third plane. Starting with midtones is useful and also helps not to fill the drawing from the beginning and to mark the contrasts after finishing with all the shadows.
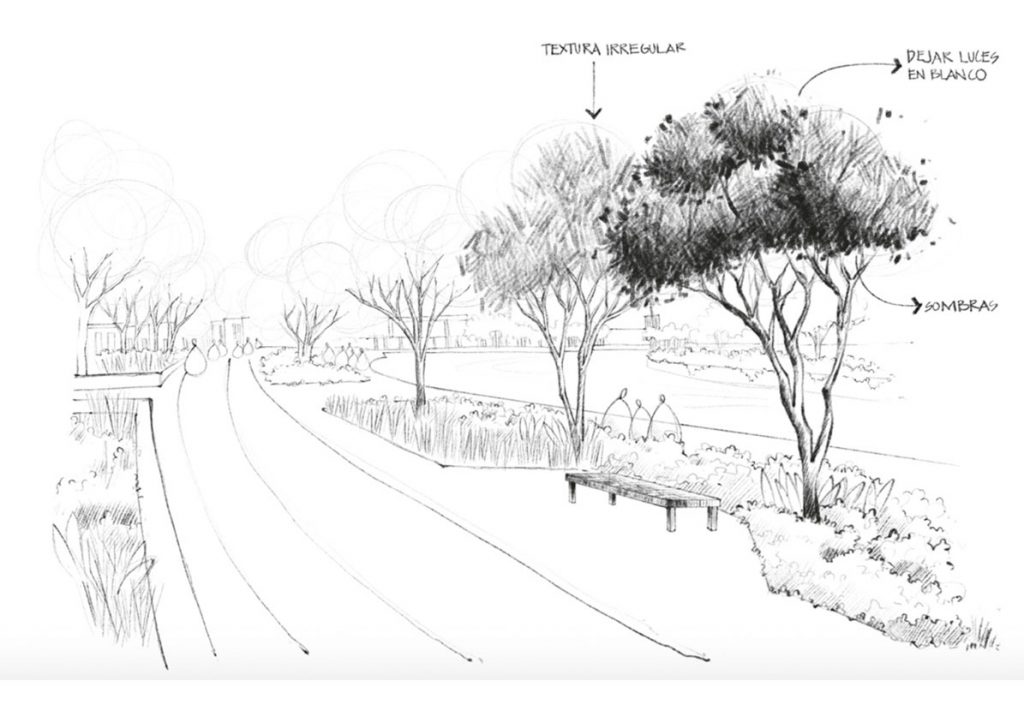
Illustration: Stephanie Lagunas
06- Shadows for each visual plane:
The more distant the objects are, the more the stroke becomes blurred.
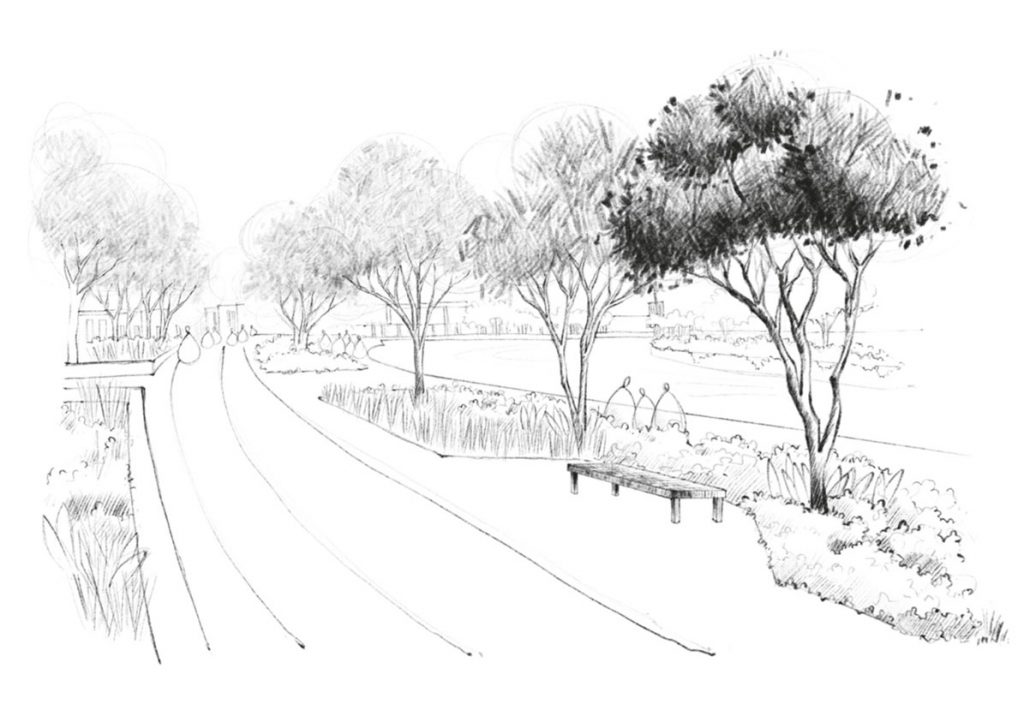
Illustration: Stephanie Lagunas
07- Foreground shadows:
You can press the pencil a little more and darken the shadows. In the areas where the light falls it is ideal to leave it white.
08- Second plane shadows:
Repeat the procedure to draw the shadows of the foreground, but this time lower the tones to lighter grays, you can do it with soft pencils and pressing very little the pencil on the paper.
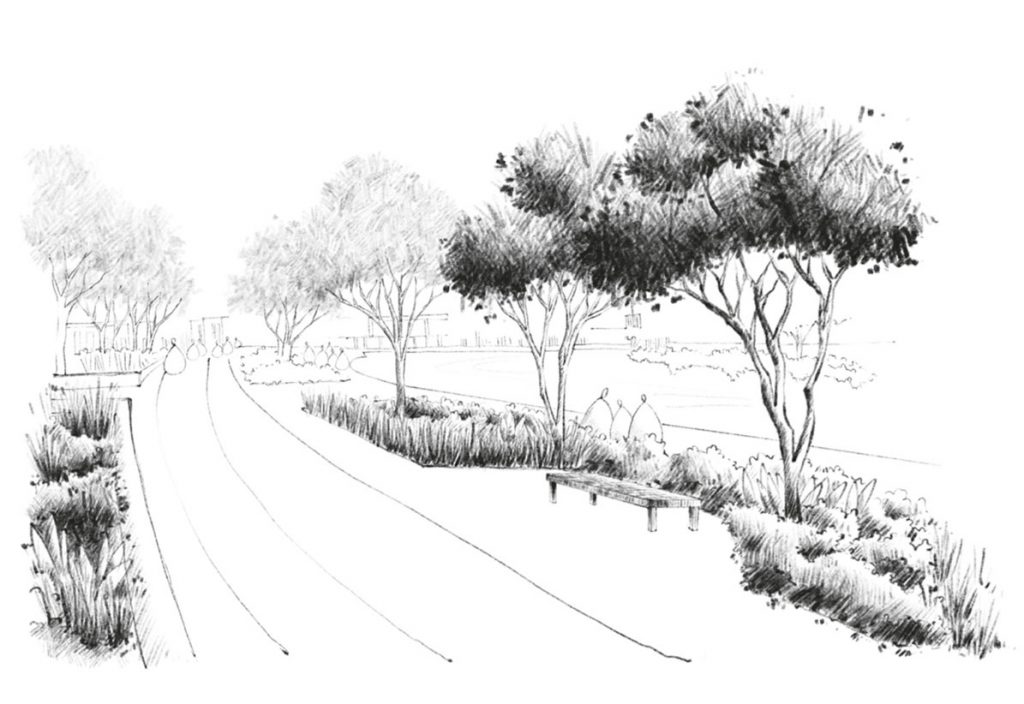
Illustration: Stephanie Lagunas
09- Third plane shadows:
As you can see, the objects in the third plane are losing details and definition, the strokes in this plane will be the faintest. Here the objects can lose a little shape, but always maintain the proportion with respect to the other levels.
10- Accentuating shadows:
Here we refine details, it is time to mark more contrasts between light and dark, you can achieve this by highlighting the darkest shadows and adding midtones where there are no shadows yet. You can even add more details in the foreground like the pavement tiles.
11– Reflected shadows:
Drawing these shadows can be very subjective. The angle of our light source determines how long the shadows of the objects will be. You can observe the behavior of reflected shadows with physical objects. For this drawing we took into account the light source marked in point 3 and simulated where the reflected shadow would fall.
12- Reflections
Reflections arise from light bouncing off other objects. To mark them you can make use of the eraser and give small touches under the shadows of each object.
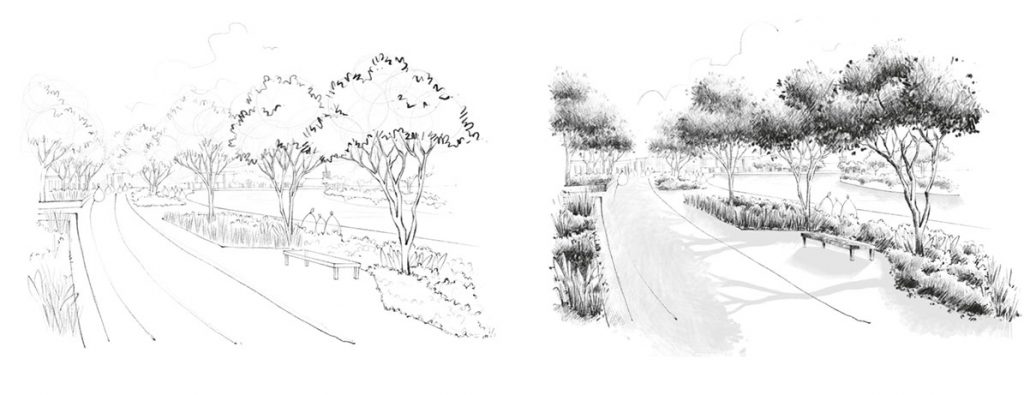
Illustration: Stephanie Lagunas
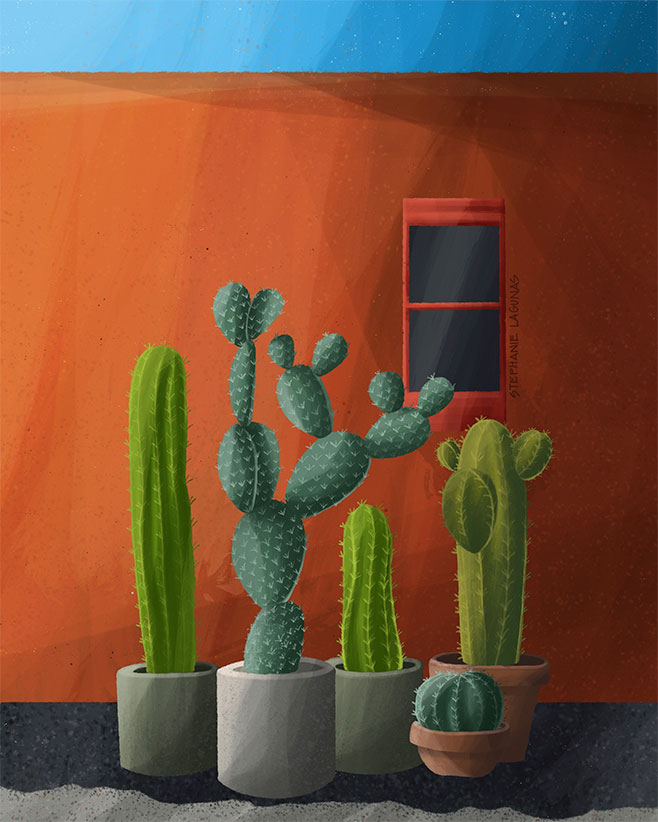
In this illustration the main subject is the cactus. We can see that the cactus are not only affected by the light source, but also by the shadows cast by the objects themselves on each other.
The scene is similar to the step by step. We can observe the visual layouts, projected shadows and their own shadows.
As we can see, the shadows give more presence to our drawing, besides it can be understood much better than one without shadows.
We do not need to be experts in physics or how light travels. Architectural drawing is about expressing ideas and reinforcing concepts. It’s a matter of observing our surroundings and daring to experiment.
Illustration: Stephanie Lagunas


-10.28.24.jpg "Anunciate07-13-a-la(s)-10.28.24")

 13.26.42.png "Captura de Pantalla 2023-02-08 a la(s) 13.26.42")


