Microgreens
Learn what microgreens are and how to grow them with Gustavo Cumplido and Karla García
Microgreens are defined by the USDA as edible greens which germinate from the seeds of vegetables and herbs and are harvested without roots at the seedling stage. This product is harvested when cotyledons are fully developed. The cotyledons function within a plant is to supply nutrients to the seedling.
The Agricultural Research Service (ARS) researchers tested about 25 variet ies of microgreens for their nutrient levels and found on average they had about five times greater levels of vitamins than their mature counterparts. This is why microgreens are referred to as a superfood product.
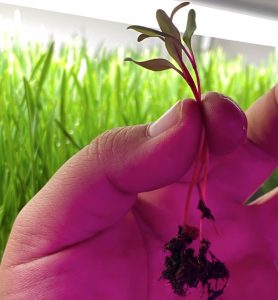
Beet sprout
Fotography: Gustavo Cumplido Barragán
Microgreens can be grown at home, inside greenhouses and plant factories. The most common way of production for this product is inside plant factories using vertical farming systems. This system allows you to produce higher yield in less space providing ideal environmental conditions. Speaking from a more culinary approach, microgreens are the perfect “garnish” for your dishes and drinks,
they provide a touch of elegance, color, flavor and a lot of nutrients. We can really add them to any type of food, whether cold or hot. One of the most attractive aspects of microgreens is how easy they can be grown at home. This product can be grown and harvested in 2 to 3 weeks and without the need of fertilizers or pesticides.
Now let’s get to work, what do we need to grow microgreens? Seeds, substrate, germination trays, and a light source (natural or artificial).

Radish microgreens
Photography: Gustavo Cumplido Barragán
Steps:
01- Prepare your seed.
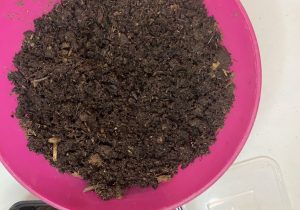
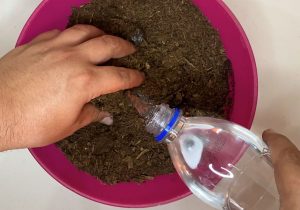
02- Substrate. It must have good water retention. We recommend the “peat moss” or Canadian peat. Moist substrate in a separate bowl to get ready to make your trays.
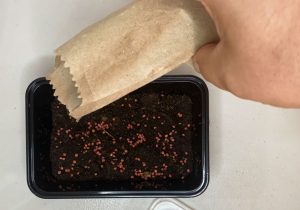
03- Spread a little substrate on the bottom of the tray making small pressure on the tray (approximately 1 cm thick).
04- Place the seeds evenly on your substrate and carefully moist with a spray bottle and place the lid on the tray.
*For wheat seed, set a complete layer on your substrate.
*For small seeds, 10 to 12 seeds per square inch.
*For large seeds, 6 to 8 seeds per square inch.
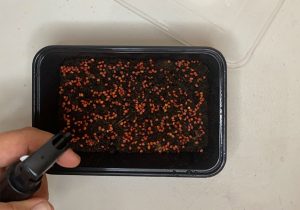
05- Keep your tray covered, at temperatures around 22°C, water as many times as you consider necessary, taking care not to flood or to dehydrate the substrate completely.
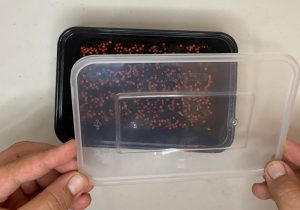
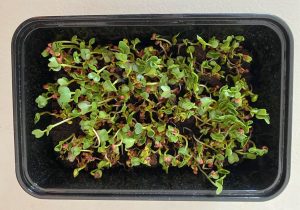
06- After about 3 to 4 days when cotyledons and roots are already present, uncover your tray and place it near a light source, avoiding direct sunlight.
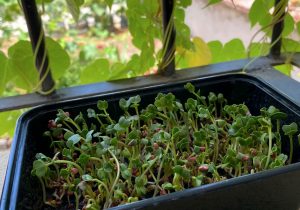
07- For the harvest, help yourself with scissors and cut your microgreens from the base. Add to your dishes and enjoy.
*For wheatgrass, remember that you have to squeeze its juice, do not consume the grass directly.

Photographs: Gustavo Cumplido


-10.28.24.jpg "Anunciate07-13-a-la(s)-10.28.24")

 13.26.42.png "Captura de Pantalla 2023-02-08 a la(s) 13.26.42")